
15 Easy Hairstyles You Can Do in Under 5 Minutes
Most quick hairstyles fail for the same reason. The shape is right, but the technique underneath it is slightly off, so the whole thing slides loose by mid-morning. The difference between a style that holds and one that does not usually comes down to a pin angle, a twist direction, or the choice of elastic.
None of the fifteen looks below need heat, and almost none need more than a tie and a few pins. What they do need is the small detail that makes each one stay put, and those details are what this guide focuses on.
The styles suit a range of lengths, though a few work best from the shoulders down. Anyone working with mid-length hair may find this companion guide to the most versatile medium hairstyles a useful pairing.
The Classic Low Bun

A low bun reads as formal without requiring anything formal from the person making it. Hair gathers at the nape, twists into a rope, and coils around its own base.
The tail end causes most of the trouble. Left loose, it works its way out within an hour. Tucking it up under the coil before the pins go in, rather than letting it sit on top, removes the loose end that everything else unravels from.
Coiling direction matters as well. Winding the rope in the same direction it was twisted tightens the whole structure. Winding against the twist loosens it, which is why some buns collapse for no apparent reason.
The Messy Top Knot

The top knot improves on hair that has not been washed. Clean hair slips through the elastic, while a day of natural oil gives the strands something to hold onto.
Flipping the head forward before gathering builds lift at the roots that no amount of pinning can add afterwards. From there, a loose twist and a wrap around the base is enough. The ends left poking out of the elastic create the fanned shape the style depends on.
Elastic choice is worth a moment of thought. One thin tie wrapped three times grips more reliably than a single thick band, because the tension distributes rather than concentrating in one ring.
The Half Up Half Down
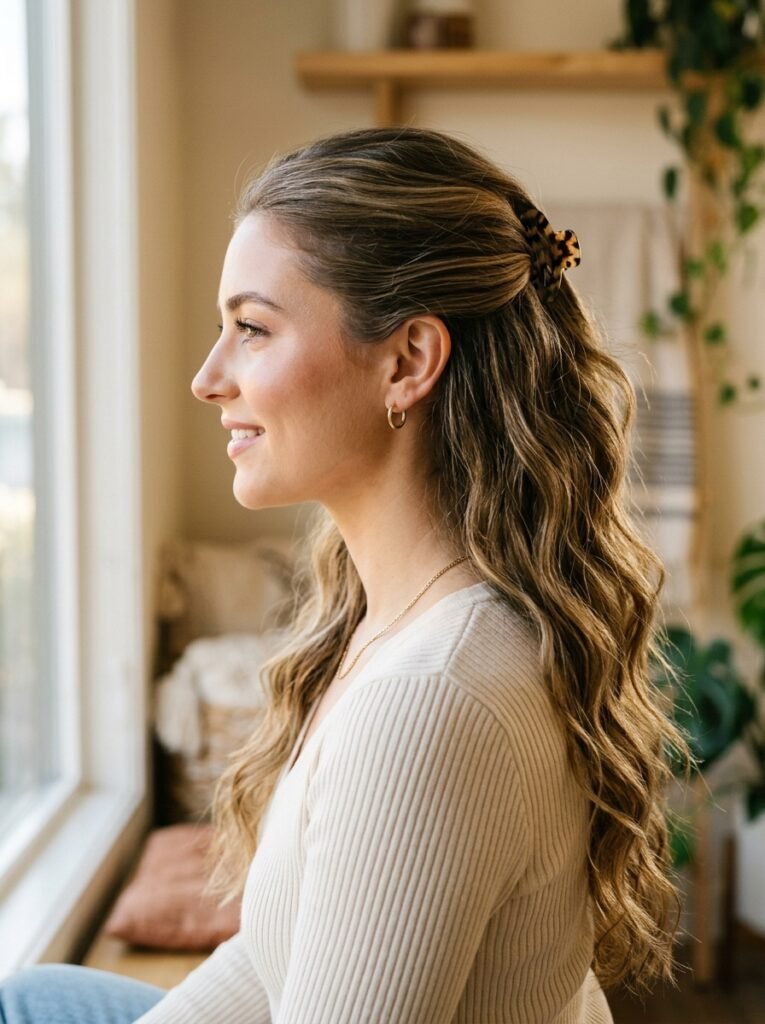
What secures a half up style changes its whole silhouette. A small elastic pulls the section tight and sits close to the head. A claw clip holds the same hair in a looser fold and adds bulk at the back. Pins sit flattest of the three and disappear entirely.
Whichever fastening goes in, hiding it improves the result immediately. Lifting the top layer of the gathered section, fixing underneath it, and letting that layer fall back over the top conceals the mechanics.
A light backcomb at the crown before gathering adds height and stops the style reading flat. Two or three gentle passes are plenty.
The Sleek Low Ponytail
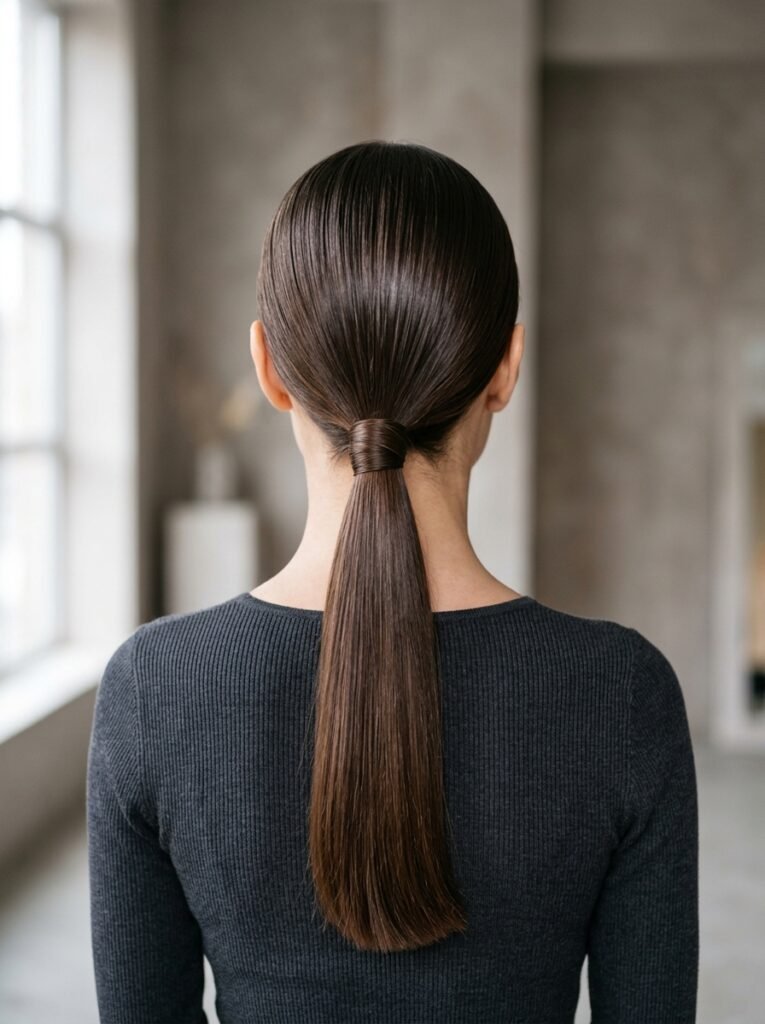
Smoothness comes from the order of operations. Brushing the sides down first and the back last means the final pass sets the direction everything else follows, which prevents the ridges that form when the sequence runs the other way.
Product belongs on the brush rather than on the head. A little gel or hairspray worked into the bristles distributes evenly, while spraying directly leaves wet patches that dry stiff. Short hairs around the hairline respond better to a small edge brush than to more product.
Wrapping a slim section of hair around the elastic and pinning it underneath hides the fastening completely. It adds perhaps fifteen seconds and does more for the finish than anything else in the sequence.
Tension deserves a caveat, since slicked-back styles pull hardest at the hairline. The British Association of Dermatologists notes that tight ponytails are a common cause of traction alopecia, with hair loss appearing at the front and side margins of the scalp. Caught early, the hair regrows once the tension stops. Repeated over years, the damage can become permanent, so a style that aches is worth loosening.
The Bubble Ponytail
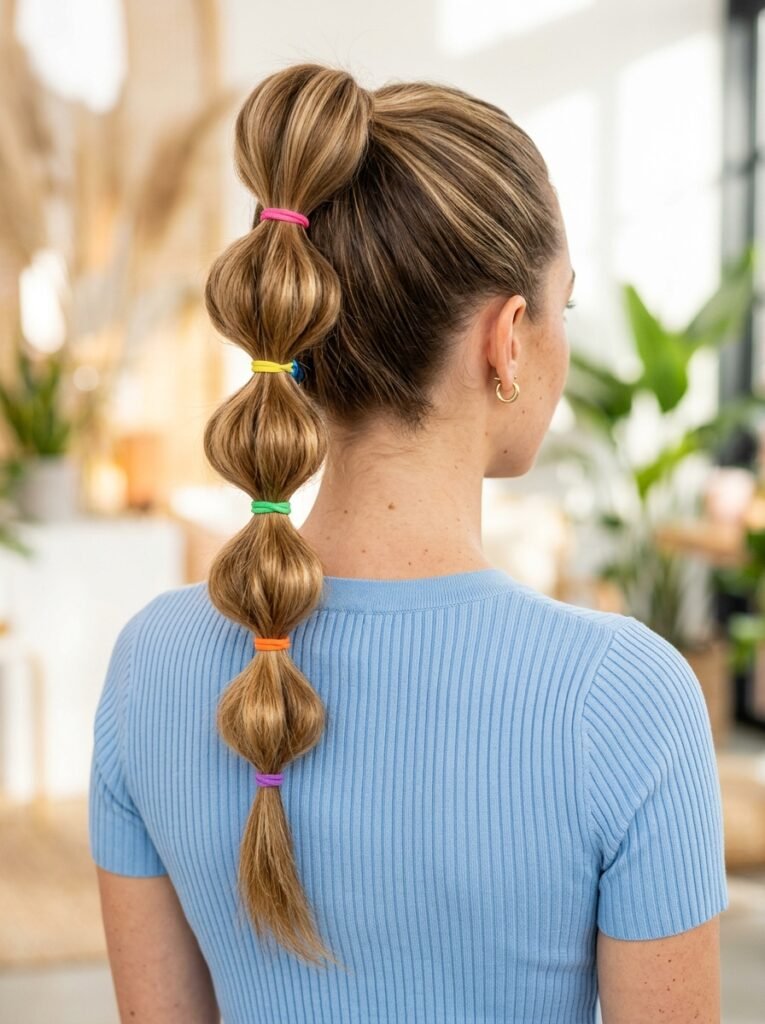
Spacing decides whether this reads as designed or accidental. Ties placed roughly five to eight centimetres apart give bubbles with enough room to round out. Closer together, the ponytail looks constricted rather than segmented.
The puffing technique trips people up. Pulling at the sides of each segment widens it, while pulling at the top and bottom simply drags hair through the elastic and flattens the shape.
Fine or freshly washed hair collapses back down within minutes. A light texture spray through the lengths before starting gives each bubble enough body to keep its shape. Clear elastics vanish against most colours, which keeps the focus on the segments rather than the hardware.
The Twisted Crown

Two side sections travel backwards and meet at the crown. The result looks considerably more complicated than the two movements involved.
Twisting away from the face is the detail that makes it sit flat. Twisting toward the face lifts the strand off the scalp and creates a gap that catches light and looks unintentional. The same rule applies on both sides, which means the hands work in mirror image.
Pins should cross the twist rather than follow it. A pin slid in parallel has nothing to bite against and slips out. Pushed in perpendicular, catching a little hair from underneath, it anchors properly.
The Classic French Braid
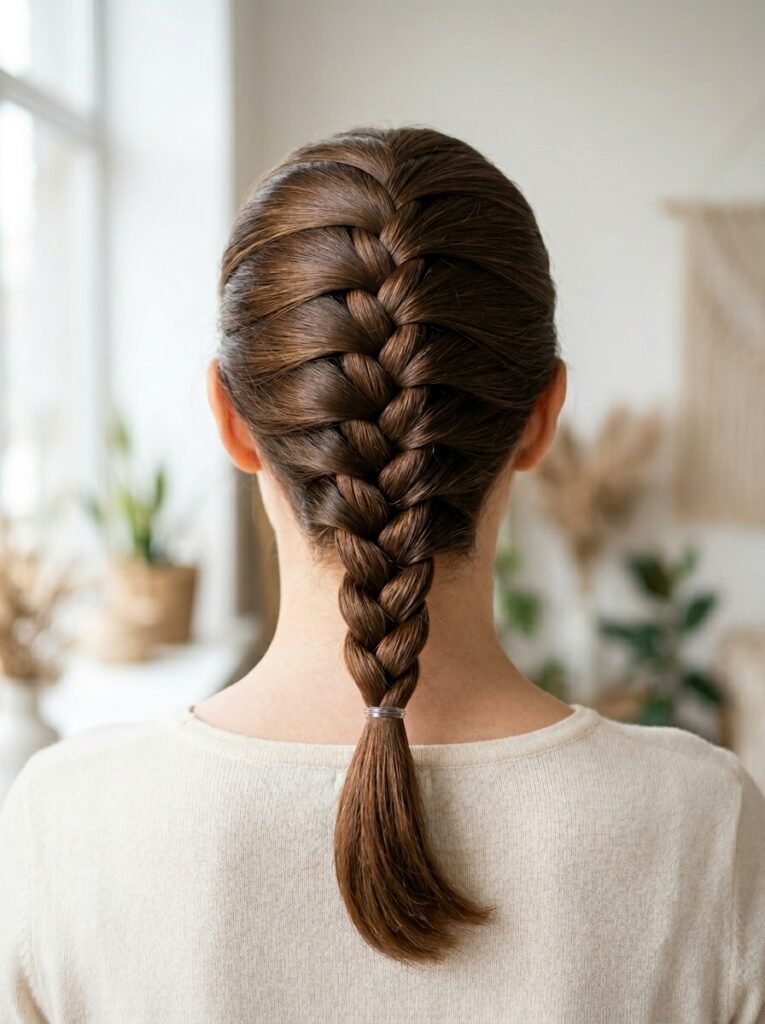
A French braid begins with three sections at the front hairline and gains hair with every crossover. Where those first three sections start decides where the braid sits, and moving them back toward the crown produces a braid that begins lower and shows more of the hairline.
Consistency beats tightness. The fed-in pieces need to be roughly equal, because a large pinch followed by a small one creates a visible bulge that no amount of smoothing corrects. Even tension throughout matters more than pulling hard.
Slightly damp hair braids more easily than dry hair, since the strands grip each other instead of sliding apart. Heavily layered cuts complicate matters, as shorter pieces escape partway down; this guide to long layered cuts for thick and thin hair covers how those layers behave.
The Simple Side Braid

Sweeping everything over one shoulder and plaiting it is the simplest style here, and the one most likely to migrate back to centre during the day. Securing the hair at the nape with a small elastic before braiding fixes it in position.
Widening the finished braid is where it stops looking like a school plait. The technique is to pull only the outer loops of each crossover, working from the bottom upward. Tugging the braid as a whole loosens the structure instead of fanning it.
Stopping the braid before the ends taper to nothing leaves a fuller finish. The last few centimetres rarely add anything and often look thin.
The Twisted Half Updo

This one takes the twisted crown and stops short of a full halo, keeping the length loose beneath it. Two sections lift from the temples and travel back.
Crossing the twists over each other before fastening is what locks the shape. Joining them side by side leaves both free to unwind, whereas an overlap means each twist holds the other in place. One small elastic under the crossover handles the rest.
The length below can stay straight, waved, or curled without affecting the twist. That independence is why the style transfers so easily between a work morning and an evening out.
The Low Space Buns
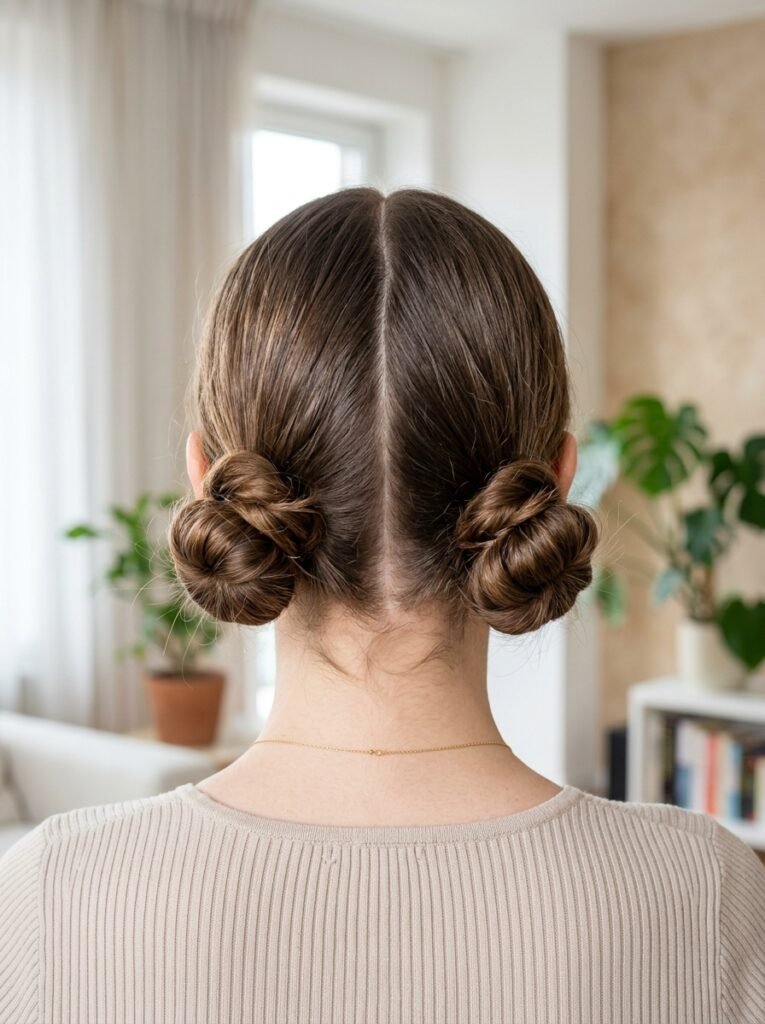
Everything rests on the parting. A line drawn with the tail of a comb, running cleanly from the forehead to the nape, produces two even sections. Fingers alone tend to wander and leave one bun heavier than the other.
Position separates the festival version from the wearable one. Buns placed behind and slightly below the ears read as a low style, while buns at the sides of the head sit closer to costume.
Splitting the hair with the head upright, facing a mirror, keeps the sections honest. Dividing it while looking down almost always produces an uneven split that only becomes obvious once both buns are finished.
The Headband Tuck

The band goes on over the hair, lowered from above onto the head. Sliding it back from the forehead drags the front sections along with it and flattens the shape before the tucking even starts.
Tucking proceeds in small pieces, starting at the front and working around toward the back. Large sections create bulges. Small ones build the smooth continuous roll the style is aiming for.
The nape is the awkward part, since that hair is shortest and has the furthest to travel. Two separate tucks handle it better than one determined attempt. A wide soft band grips considerably better than a thin elastic one, which tends to slide up the back of the head.
The Quick Fishtail Braid
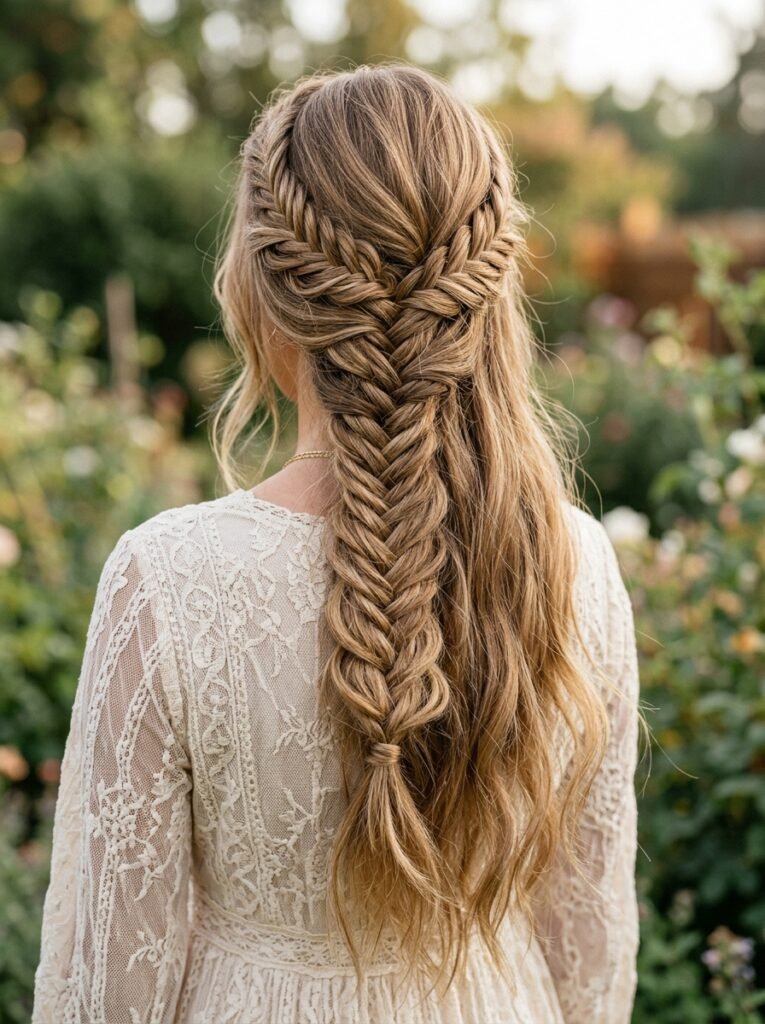
A fishtail uses two sections rather than three, and the movement never varies. A thin piece taken from the outer edge of one section crosses to the inner edge of the other, then the same happens in reverse.
Piece size controls both the pattern and the clock. Strands of roughly one to two centimetres give a clear woven look in a few minutes. Thinner pieces produce a finer weave and take considerably longer, which defeats the purpose on a weekday.
Keeping an index finger between the two sections stops them merging, which is the usual point at which a fishtail turns into a tangle.
The Twisted Low Ponytail

Two sections, each twisted, then wound around one another. The rope effect looks like a braid and takes about a third of the time.
One rule governs whether it survives the morning. Both sections twist in the same direction, and the pair then wind around each other in the opposite direction. That opposition is what locks the rope. Twisting and winding the same way lets the whole thing unspool within minutes.
Height is a free choice here. At the nape it looks composed, and a little higher it looks sportier. Easing the twists apart slightly at the end softens the finish without loosening the structure.
The Pinned Back Twist

This is less a hairstyle than a repair, and it takes about twenty seconds. Front sections twist back from the face and pin behind the head, leaving everything else loose.
Bobby pins go in wavy side down, against the scalp, not flat side down. Most people wear them upside down, which halves their grip. Crossing two pins into an X rather than sliding both in parallel doubles the hold again.
Shorter cuts manage this style where they cannot manage most others, since only the front pieces need enough length to reach the back of the head.
The Claw Clip Updo

The claw clip updo fails more often than any other style on this list, almost always for the same reason. The clip catches only the folded hair and not the hair growing from the scalp beneath it, so the whole arrangement slides down within the hour.
The fix is in the angle. After twisting upward and folding the tail down, the clip goes in from below with its teeth pointing toward the nape, scooping up hair from the scalp before it closes over the fold.
Clip size should match hair volume rather than personal preference. A small clip on thick hair strains and pops open, while an oversized clip on fine hair has nothing to grip and swings loose.
Final Thoughts

A short list beats a long one in practice. Three styles done confidently cover more mornings than fifteen half-remembered ones, and the confidence only comes from trying them when the clock is not running.
Most of the techniques here transfer between styles. Pin direction applies wherever pins appear. Twist direction governs buns, ropes, and crowns alike. Learning those two things improves every style on the list at once.
Comfort is the last check worth making. A style should be unnoticeable after ten minutes. Anything that still registers as pressure is pulling harder than it needs to.
Frequently Asked Questions

Which of these styles is fastest? The pinned back twist takes around twenty seconds, and the claw clip updo is not far behind. Both need one accessory and no sectioning, which is what makes them quick.
Do these work on shorter hair? Several do. The pinned back twist and the half up half down need only the front sections to reach the back of the head. Buns, ropes, and fishtails need length from the shoulders down to hold their shape.
What is worth keeping in the drawer? Thin elastics, clear elastics, a handful of bobby pins, one claw clip sized to the hair, and a soft headband. No heat tools appear anywhere in this list.
Why do bobby pins keep slipping out? Usually because they go in upside down. The wavy side belongs against the scalp, where the ridges bite. Crossing two pins into an X holds better than sliding two in side by side.
Which styles suit unwashed hair? The messy top knot and the headband tuck both perform better on second-day hair, since a little natural oil gives the strands grip. Freshly washed hair tends to slide out of both.